Thursday, 30 October 2008
Mica Powders
This is my entry for this week's Wednesday Stamper which is an open theme. I thought I'd take the opportunity to experiment, so this is an ATC made using mica powders (I've used a combination of Perfect Pearls and Cosmic Shimmer). I created the background by sprinkling the powders into a thick layer of PVA glue and heat drying to create texture. Then a I took a chipboard flower and coloured it by covering it with Versamark ink and dabbing the mica powders onto it. I set the powders and then covered it with three layers of UTEE and stamped the image into it. I attached it to the background and then added some micro beads in the centre and around it to make it stand out from the background. I hand wrote the word "shine" on gold pearlescent card, layered it onto some sparkly mesh and attached it using brads.
Bad Hair Day
I made the background on this one using three different types of mesh stuck into a thick layer of PVA glue which I heat dried and stuck on a clay face. I painted over it all with acrylic paint and then sprayed with Radiant Rain Spray and heat dried again. I then added some copper metallic rub-on and various fibres for the hair.
Tuesday, 28 October 2008
Experiments with Alcohol Inks
I made these ATCs for an alcohol ink themed swap. I wanted to use the inks in an unconventional kind of way (I'm an unconventional kind of person).
The one on the right was done using alcohol inks on a Teflon sheet, swirling the card around on top. I wasn't 100% happy with the result I got so I had a think about how I could change it and sprayed it with the cheap hairspray that I normally use for setting chalks etc. (I would NEVER put it anywhere near my hair!) As you can see, this has given it a nice grungy look, a bit like spraying a distress inked background with water. I coloured the button with Sharpie pens and sprayed that with the hairspray too to blend the colours together. I stamped the background writing with a Memories Electric Rainbow inkpad and then the main image in black Stazon. (Having seen how well the Memories ink stamps on alcohol inks I now need to get a black Memories pad).
The one on the left was done using alcohol inks and silver mixative with a Spin and Splash. I stuck it onto mountboard and then added three layers of UTEE and stamped the image into the UTEE. I added the beads on wire at the bottom to finish it off.
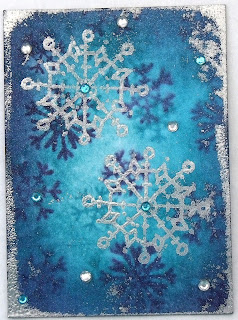
A Few Christmas ATCs
Monday, 27 October 2008
Think Monday Think ATC - Staples
This is my ATC for this week's TMTA. The theme is staples. - some staples must be included somewhere on the ATC. I enjoyed this challenge as I've never used staples on an ATC before.
I created the background for this one using gesso and distress inks and stamped some text onto it. I layered on some text from a book page and some mesh (also coloured with distress inks), then stapled down the side. I distressed the staples, the brad and the metal heart using distress embossing powder and a Sharpie Pen to create the illusion of rust, then added the various elements.
(Sorry for the poor quality picture. I've scanned it so it's a bit blurry in places. I'll try and get a better one tomorrow when I've had time to read the instructions for my new camera!)
Sunday, 26 October 2008
Metal Madness
It's what I'm suffering from so it's what I've decided to call this ATC. I've bought some proper embossing metal for the first time ever. (Usually I use bits cut out of the bottom of aluminium trays and roasting tins bought from the pound shop!) I'm having a lot of fun with it at the moment.
This is freehand embossing using a fine ball tool on copper. (Basically doodling on metal). I painted over it with black acrylic and then sanded over the top to give it a distressed appearance and added a bit of metallic rub-on. I used a mountboard background and created some texture around the edges using tissue paper and acrylic paint with a bit of metalic rub-on over the top, attached the embossed copper and added eyelets at the corners. I then added some fibres through the eyelets in co-ordinating colours to finish it off.
Toxic Waste ATC
This is an ATC I made last night. I've called it toxic waste because that's what I thought it looked like when I finished it. I've used a mountboard base, cut holes in it and put copper mesh behind. I created the background using lots of textured bits and pieces which I stuck on using PVA glue and heat dried. Then I painted over it with copper acrylic and added metallic rub-ons over the top in various colours. The skull is Grungeboard which I've painted with acrylic and added copper metallic rub-on over the top.
Stamped Tag
This tag was made for Bobs' challenge on the DoCrafts forum. Bobs provided the tag, a piece of book page, a star and the printed word "imagination", and specified that everything had to be a different colour than how it started off. I decided to go for the seaside theme partly because I wanted to be reminded of summer and partly because I had some stamps I hadn't got around to using yet!
Monday, 20 October 2008
Think Monday Think ATC - Trick or Treat
This week's challenge on TMTA is Trick or Treat.
I started by inking the background with distress inks, spritzing it with wate adn heat drying it, then I stamped the cobwebs in Versamark and dabbed some Cosmis Shimmer powders onto them, takign the excess off with a sponge. I then stamped the house, the owls and the spiders in balck ink. I drew the ghost on a separate piece of card and stuck him in the window, stamped the skeleton onto a piece of white card and cut him out, and added a hand drawn witch's hat and hair made from fibres. Finally I printed out the words, cut them out and stuck them on.
Sunday, 19 October 2008
Traffic Lights
I'm hosting a "Traffic Lights" swap on the DoCrafts forum, the idea being that each person creates three ATCs, one green, one amber and one red, and each ATC must have on it some metal, some plastic and some wire.
I created all three backgrounds in the same way. I coloured them using spray inks, stamped on them and added a thick layer of PVA glue. I stuck the mesh into the PVA and then heat dried it to create some texture. I then added some coloured embossing powder at the corners and stamped some swirls into it.
On the green one, I coloured some aluminium using alcohol inks, embossed it freehand and then added some of the darker green alcohol ink around the edges. I painted a plastic lizard using three colours of acrylic, added a gem to its head and then wrapped some wire around it with beads on it.
For the amber one I created some stamped shrink plastic tiles, joined them together using jump rings, made holes in the ATC and added eyelets, and attached the tiles using wire through the holes, which i curled around at the ends. I then added some more coils of wire at the other side.
For the red one, I made the head using Friendly Plastic in a mould, stuck the head in the middle and added the cogs and wheels and added some micro beads around them. I also added some coils of wire at the corners.
Indian Summer
These ATCs are for a swap being hosted by Crafty Vonx on the DoCrafts forum on the theme of "Indian Summer". Each ATC had to include the colours pink, orange and red and some metal. These are not colours I would normally use together, but I enjoyed the challenge.
I used some handmade Indian papers that I'd had hanging around unused from my card making days for the backgrounds. The elephants are embossed on aluminium. I did them using a clipart picture of an Indian elephant as a template and added the rugs and headpieces freehand. I coloured them using alcohol inks. On the one on the left I applied the inks after embossing by dripping them on, adding a bit of blending solution and swiping a piece of felt over. On the one on the right I inked the metal first, then embossed it and sanded over the top to take the colour off on the embossed bits.
Tuesday, 14 October 2008
Mixed Media Monday - Purples/Blues
This is my entry for this week's Mixed Media Monday challenge. I haven't participated before but this week's theme is purples/blues, which I love working with so I couldn't resist. This is a 5" x 7" canvas which has been sitting on my desk for months waiting for me to do something with it, so I finally took the plunge. (It's my first one, so please go easy on me!) I painted the background in black acrylic, painted some interference watercolours over the top and then painted the castle and dragon in black acrylic once it was dry. The hill at the bottom is scrunched up tissue paper which I dry-brushed with gold acrylic and then added embossing powder in blue, purple and sparkly gold. The rocks along the bottom are pebbles I picked up on the beach on holiday which I've painted gold. The moon is moulded from Makin's Clay and painted gold. I also added a bit of gold paint to the sky around the moon and some gold highlights for the stars and windows in the castle. I framed it with eggshells which I painted gold and then added embossing powder in purple and blue. It's a lot more shimmery and shiny than it looks in the picture.
Monday, 13 October 2008
See Through ATCs and my First Attempt at Soldering
These are the last three ATCs for my see through swap. I've done five altogether and I wanted to have a different see-through element on each one, so I've used fabric, acetate, tissue paper, a microscope slide and fusible film. The top one is a microscope slide, which I've alcohol inked on one side and stamped on the other side. I cut the ATC from mountboard and cut a hole in it for the slide and slotted it in. I then soldered around the edges of the slide on both sides to keep it in place. This was my first attempt at soldering, and I would definitely say it's not as easy as it looks (although I did find it a LOT easier once I realised I was supposed to put copper tape around the edges of the slide first)! I painted the background silver, stamped the clock backgrond on tissue paper and stuck it on using Mod Podge and then added silver embossing powder around the edges.
For the second one, I stamped the image on tissue paper and inked it on the back then painted a layer of Mod Podge on both sides. (I didn't like this one because I had to wait for it to dry!) I cut the frame from mountboard and covered it with black tissue which I painted using interference paints. (The frame has a shimmery finish which doesn't show up in the photo.) I then attached the tissue to the frame.
For the last one. I created the background using a rainbow inkpad and stamped the brick pattern onto it. I stamped the house and then masked it off and added some Glitz Spritz spray around the edges. I cut out the window and added some fusible film behind it which I'd heated firstly by ironing to fuse it together and then with the heat gun to bring out the colours. I finally added the little gold star and some gold rub-on around the edges.
Sunday, 12 October 2008
New Stamps!
I spent yesterday at the Happy Stampers North West show at Port Sunlight, where I had a fantastic day, met up with a few people I know from the DoCrafts forum and bought some nice new things.
These ATCs are for this month's swap hosted by Sam on the UK Stampers forum, the theme for which is "newest stamps", and I made them using some of the stamps and other bits and pieces I bought yesterday.
The background on the top one was made using spray inks and then stamped. I added UTEE over the top and stamped the image into the UTEE. (The white bit to the right is just a reflection).
The background of the second one was created using distress inks and Glitz Spritz spray and stamped. The main image was stamped on aluminium (which I'd coloured using alcohol inks) and embossed. I sanded over the top to highlight the image and added touches of colour using a Sharpie pen.
The third one has a stamped and embossed background (black embossing powder on black card, which I would never have thought of doing until I saw it today at the show but love the effect of). The house is stamped and embossed (also black on black) and then painted using interference paints. It has a shiny metallic finish that doesn't show up on the photo. I've cut the house out and stuck it on raised slightly on foam pads. I thought it needed something in the window so I've added a cut out butterfly.
The final one has a background that I created using spray inks and a water spray. I then stamped a background pattern and the borders. The main image is stamped onto a piece of linen which I also coloured using the spray inks. I cut it out and layered it onto the card over a piece of shiny mesh.
Labels:
Artist Trading Card,
ATC,
Fabric,
Metal,
Rubber Stamping,
UTEE
Tuesday, 7 October 2008
Night Flight
I'm hosting a "see-through" themed ATC swap on the DoCrafts forum and this is one of the ATCs I've made for it. I created the background using distress inks and stamped the writing onto it. I then stamped the dragon and cut out the moon and layered some shiny gold chiffony type fabric behind it. I then added another layer of card behind to keep it in place. I added some Grungeboard flourishes at the corners which I embossed with Cosmic Shimmer embossing powder.
I've shown a scan and a photo here so you can see what it looks like with and without something behind it (although in reality it looks a lot more gold and shiny than it does in either picture).
Oh, and I didn't realise my thumbnail was chipped until I looked at the photo!
A Touch of Magic
Cazro is hosting a swap on the DoCrafts forum on the theme of Witches, Wizards and Ghouls etc, and these are the ATCs I've made. The red wizard is stamped and painted with Perfect Pearls and the background is stamped and embossed with Cosmic Shimmer embossing powder.
The red enchantress has a Radiant Rain spray background and is stamped and embossed in gold glitter embossing powder. I've added metallic rub-on on her cloak and a bit of Stickles on the crystal ball.
The shape shifter one has an inked and stamped background and I've stamped the image into three layers of UTEE, to which I've added some Cosmic Shimmer embossing powder around the edges. (The embossing powder doesn't look at all how I expected it to but I like the effect.
The purple enchantress was done using distress inks for the background which I spritzed with water and then stamped with cobwebs. I stamped a gothic text and rose stamp over the top in Versamark and covered it with Cosmic Shimmer Powder and then stamped the enchantress in black Stazon over the top of that.
The background for the purple wizard was done in the same way, but I covered it with UTEE and stamped the image into that.
Monday, 6 October 2008
Alex's Bookmark
These are the front and back views of a bookmark I made for my six year old son. (You can see a bigger picture if you click on them.) I thought he'd like the dancing skeleton, but regretted that idea a bit after it took me two hours!
I made the background using distress inks and Cosmic Shimmer spray. I also stamped cobwebs in Versamark and covered with Cosmic Shimmer Powder but they don't show up very well in the photo. I stamped the writing, the owl and the spider in black Stazon and stamped the skeletons on a separate piece of card and cut them out.
A day later it's a bit bent and crumpled, but still holding out so far! I reckon I'm probably going to have to make a few more of these.
Sunday, 5 October 2008
Gothic Arches: Turquoise
This is my entry for this week's Gothic Arches challenge on the theme of Turquoise. I created the background by crumpling up some paper, inking it in two colours and spritzing it with water. I dried it with my heat gun and then ironed it flat. I stamped over the background in white with a lace stamp, although this doesn't show up well in the photo, and stamped some flourishes around the edges in turquoise. I then stamped my main image on a separate piece of card, tore around the edges and coloured it with inks. I layered the image onto the arch on top of some shimmery mesh, coloured the lace and flowers using inks and then added the lace, fibres, butterfly and flowers.
Saturday, 4 October 2008
Look What I Got from the Pound Shop!
It's a hanging bird table which I thought would be great for altering. I rarely find these bargains so I'm feeling pleased with myself. I'm hoping to get started on it tonight, so I thought I'd post the "Before" picture.
I have something else to do first though. My six-year-old son Alex is getting really into reading at the moment, and this afternoon he said he really needs a bookmark, so I've volunteered to make him one. I'm not quite sure where to start but I'm sure I'll think of something!
Subscribe to:
Posts (Atom)